
How to Create DOCX Document Templates
A comprehensive guide to preparing Microsoft Word files for automated document generation, including template variables and best practices.
How to Create DOCX Document Templates
This guide explains how to prepare Microsoft Word (.docx) files for automated document generation within the system. You will learn how to use template variables and follow best practices to ensure your document looks perfect.
1. Using Template Variables
The system uses a placeholder syntax to dynamically inject data into your documents.
Basic Syntax
To insert a variable, wrap the variable name in double curly braces:
{{ variable_name }}
Example:
To display a customer's name, use: {{ customer_full_name }}
System Variables
System variables are predefined by the platform and automatically populated from your project data. You do not need to configure them — simply reference them in your template and the system will fill them in during document generation.
Examples of system variables:
| Variable | Description |
|---|---|
{{ customer_full_name }} |
Full name with honorific of the primary customer |
{{ unit_number }} |
Inventory / unit identifier |
{{ project_name }} |
Name of the project |
{{ demand_amount }} |
Total demand amount for the current installment |
{{ receipt_amount }} |
Amount received in the payment receipt |
{{ demand_date }} |
Date the demand letter was issued |
{{ organization_name }} |
Name of your organization |
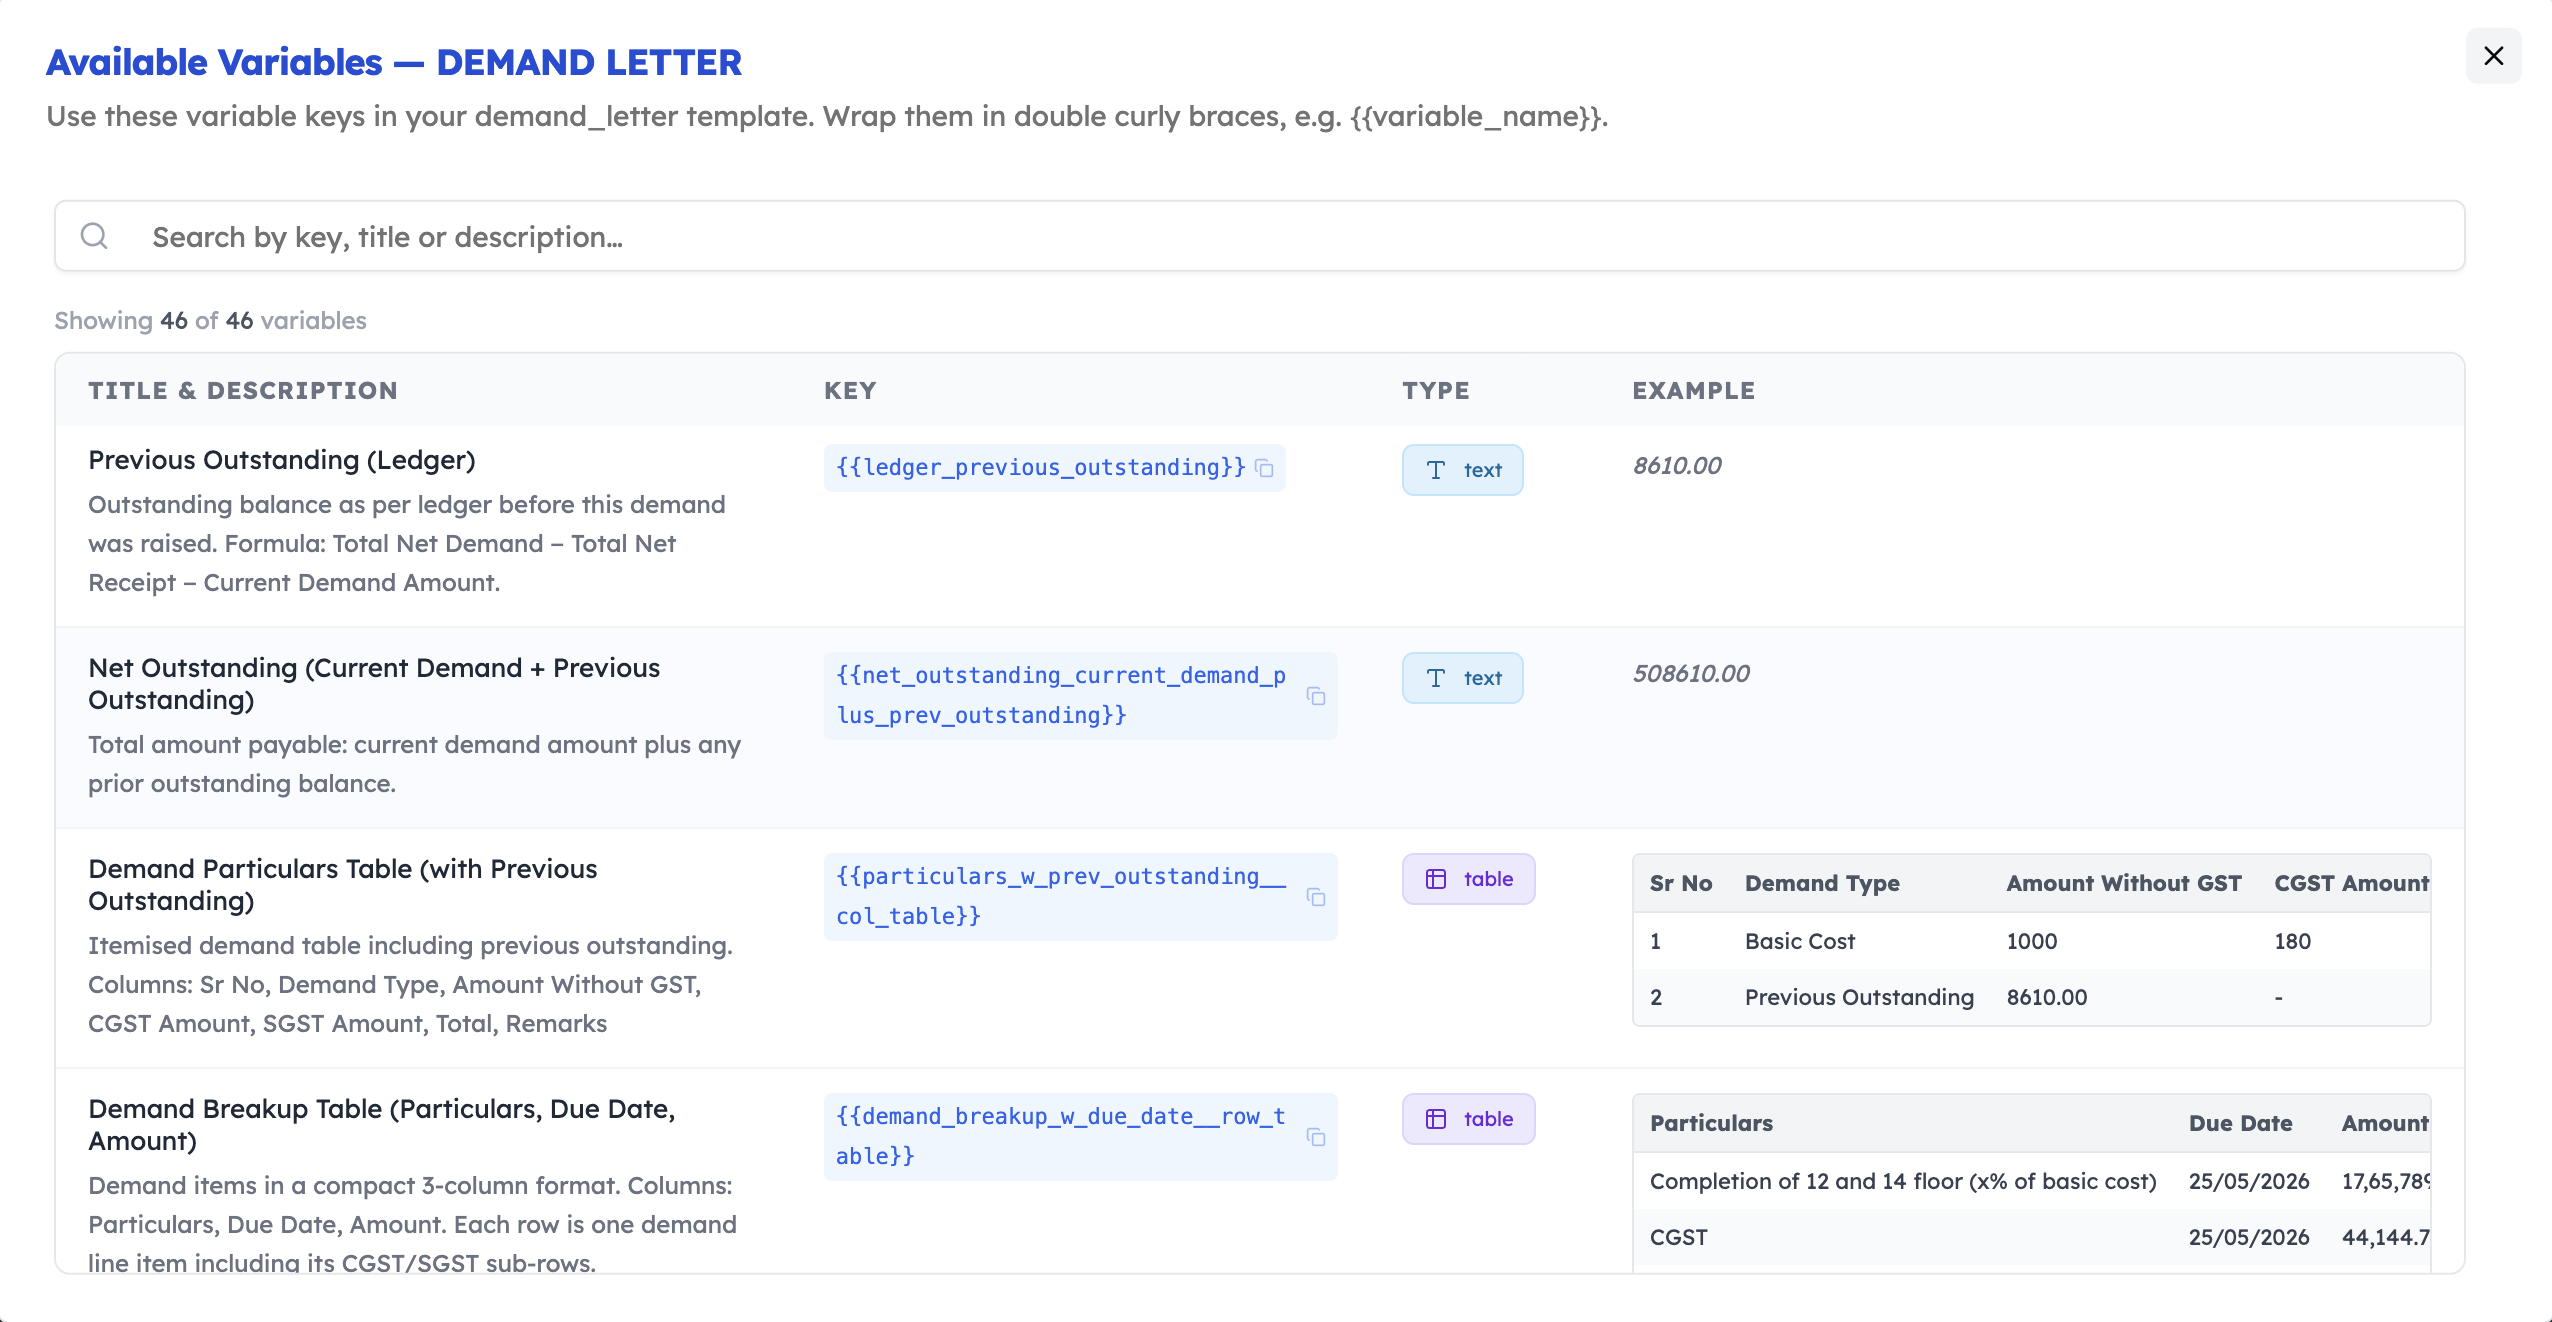
You can find the full list of available system variables for each document type in the "Available Variables" modal within the Document Templates settings.
Custom Variables
In addition to system variables, you can define your own custom variables directly inside your .docx template. These are freeform placeholders that you name yourself.
Use custom variables for content that:
- Varies between documents but is not tracked in the system (e.g.,
{{ salutation }},{{ legal_clause_a }}). - Needs to be filled in manually before sending (e.g., a covering note or a special condition).
Note: Custom variables that are not matched by the system will be left as-is in the generated document. Make sure to review generated documents for any unfilled placeholders.
Variable Naming Conventions
Following a consistent naming convention is critical for the system to correctly identify and populate your variables.
Rules:
- ✅ Lowercase only —
{{ customer_name }}not{{ CustomerName }} - ✅ Underscore separators —
{{ payment_due_date }}not{{ payment-due-date }}or{{ paymentDueDate }} - ✅ Descriptive and concise —
{{ demand_amount }}not{{ x }}or{{ the_total_demand_amount_for_this_period }} - ❌ No spaces —
{{ customer name }}will not be recognized - ❌ No hyphens or camelCase — these formats are not supported
Good examples:
{{ customer_full_name }}
{{ payment_due_date }}
{{ unit_number }}
{{ total_amount_paid }}
Bad examples:
{{ CustomerFullName }}     ❌ camelCase
{{ customer-full-name }}   ❌ hyphens
{{ Customer Full Name }}   ❌ spaces
{{ X }}                    ❌ not descriptive
Where to Find Variables
You can find the list of available system variables for each document type in the "Available Variables" modal within the Document Templates settings.
2. Best Practices for Design
- Fixed Heights: Avoid fixed height containers if content inside variables might wrap to multiple lines.
- Header/Footer: You can place variables inside headers and footers; they will be populated correctly.
- Tables: Ensure table columns have defined widths if you want strict control over the layout.
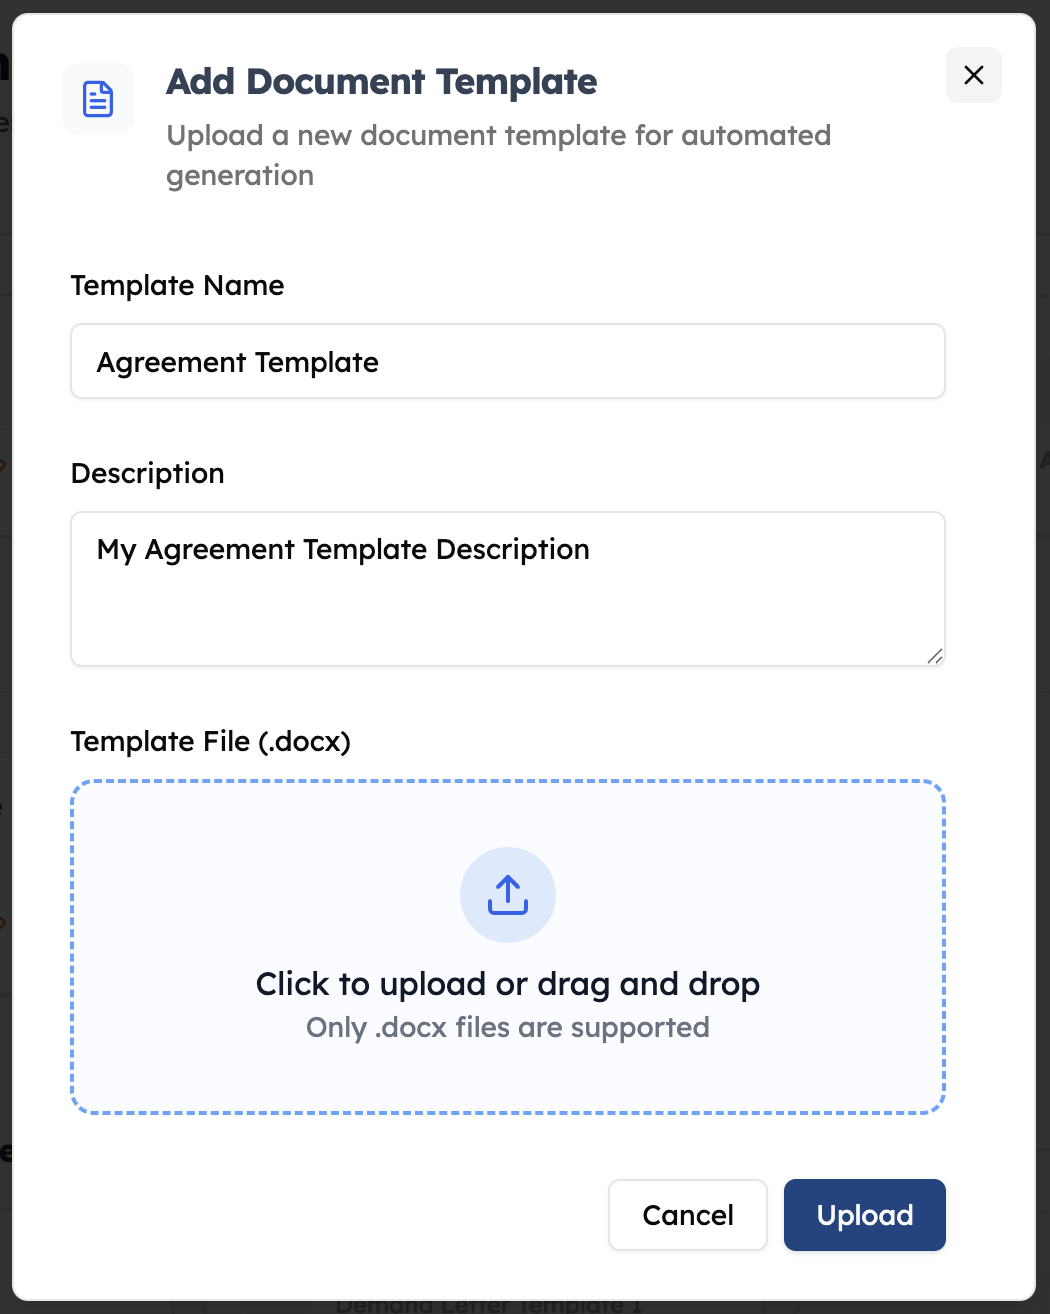
3. Uploading Your Template
Once your document is ready:
- Navigate to Project Settings > Document Templates.
- Click Add Template for the appropriate category (e.g., Agreement, Demand Note).
- Upload your
.docxfile. - Test the generation using the Preview button on an actual record.
🎉 Congratulations — You're Ready!
You've completed the guide on creating DOCX document templates. Here's a quick recap of what you've learned:
- ✅ How to use
{{ variable_name }}syntax to inject dynamic data - ✅ The difference between system variables (auto-populated) and custom variables (freeform)
- ✅ The golden rule: lowercase + underscores only for all variable names
- ✅ Design best practices to keep your layout clean and consistent
- ✅ How to upload and test your template within the system
You're now ready to build professional, automated documents. If you run into any issues, check the "Available Variables" modal for the correct variable names, and review generated documents for any unfilled placeholders.
💡 Tip: Start with a simple template using 2–3 variables and preview it on a real record before building a complex multi-page document.